
Support Hub
Support Hub

Sometimes Microsoft 365 Junk/Spam filtering will identify genuine emails for Junk, which is rare, but can happen from time to time. In this case, you may wish to “Whitelist” email addresses that are incorrectly identified as Junk or Spam in order to allow them to be delivered into your regular inbox.
In order to do this, please follow these instructions:
Step 1: Login to the Outlook Web App (OWA) by visiting outlook.office.com
If required, login with your Microsoft 365 email address and password
Step 2: In the top right corner, click on the Cog icon (see below)

Step 3: Scroll to the bottom of the list and click on View all Outlook settings
Step 4: In the menu that comes up, in the list on the right side, click on Junk email (see below)
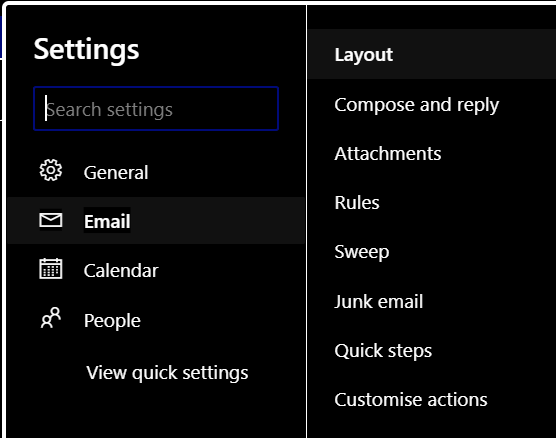
Step 5: On the right side, go to the Safe Senders List and click the Add button.
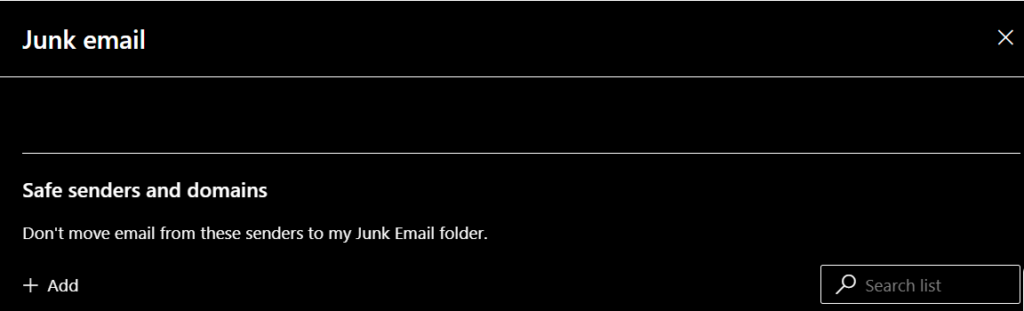
Step 6: Enter the email address of the sender that you want to receive emails from, then press ENTER
When you are in the Settings of OWA (Step 4 above), when in the Junk email settings, you should also make sure that the intended sender is not in your Blocked Senders List, if they are, remove their address using te Bin icon next to their address in that list.
You may also wish to tick the box for Trust Email from my Contacts, which may prevent you from performing this process as much in the future if you add senders to your Contacts List.
